Thursday, July 20, 2006
A reality show I could REALLY watch
So who do I call about this?
Wednesday, July 19, 2006
Backstrap weaving, the next generation
 And this
 and I looked at this one (below) for 3 days, only seeing the butterflies and flowers until someone pointed out the MC Escher-esque birds
 ignore the black lines: it was hanging on a grid (see the birds?)
 This is the Puma pattern
(as near as I can figure, 2 eyes and a nose)
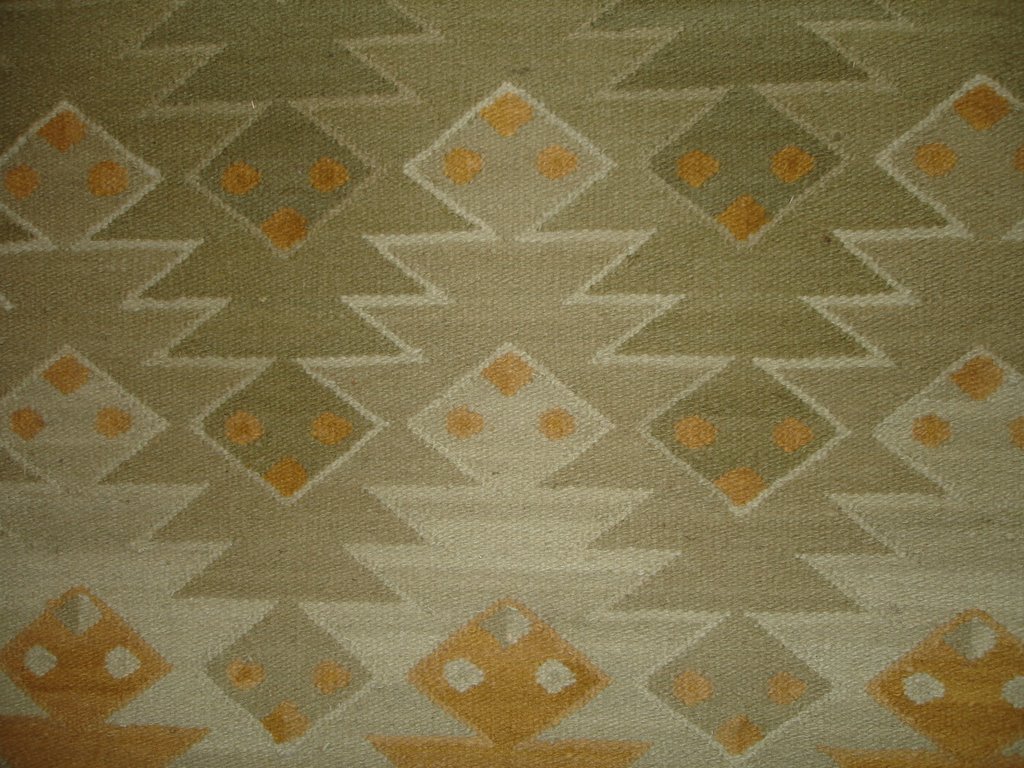
 See the face? Next to the brown wedge? This is a Huari (or Wari) design. This is a rug, approx 4x6 ft, and MINE. I bought it, and I'm not going to tell you what I paid for it, because you will be weeping and gnashing your teeth because it was SO INEXPENSIVE. We were all afraid to ask how much these pieces were, and when the interpreter told us, we said "you're kidding" and she said, "why, is that too much?" and WE said, NO, he should TRIPLE his prices. The cost of living in Ayacucho must be very low (and it is: the best hotel in town is $20/night, a B&B is about $2, and a full meal with drink, soup, meat & veg is about $1.25---anybody want to go?)
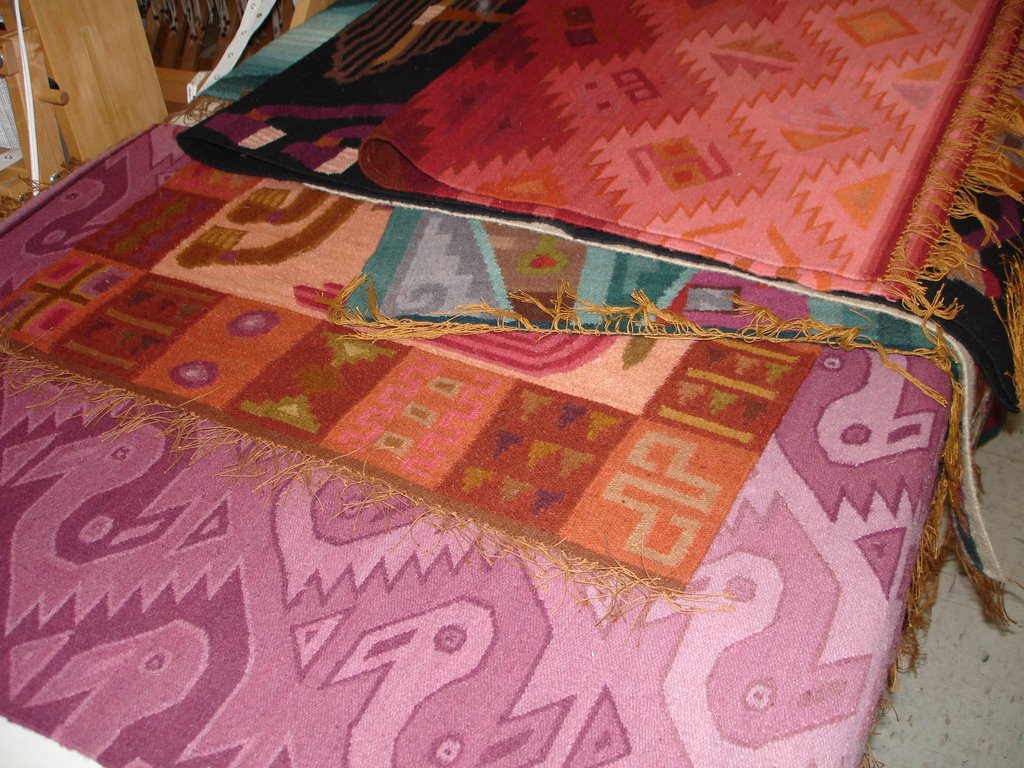
So much stuff, and by the end of the 3 days he had 2 pieces left. People were calling friends and spouses to COME AND LOOK AT THIS AMAZING STUFF. He is going to apply to be at MDSW next year! Bring money!! The interpreter said they never expected to sell anything to the class. He was supposed to take these works to the Textile Museum.
 This was his most expensive work, another rug, about 4x6 ft, less than $500. The blues come from a blueberry-like shrub called the tonka or tanka(spelling in question!--I don't speak Spanish)
All the colors in this (below) except for the blues are derived from the masicopa plant (again, questionable spelling)
 Blues from the tonka
 Alex Gallardo is a 4th generation weaver in Ayacucho, Peru. Our interpreter, Barbara Wolff met him in the museum in Ayacucho. She was excavating a site that the developers were going to build on. She found some items that might possibly be weaving implements, and was at the museum researching them. He was there looking at the prehistoric textiles. He only speaks Spanish at this point, but knows a little English (he knows more English than I know Spanish)
Alex's family collect all their own dye plants. He showed a little DVD about his family and their business. They go to the wool market to buy their wool and alpaca. His mother fluffs open the locks before handspinning on a drop spindle. All the wool is spun by his mother or aunt on drop spindles. They spin singles. They have never seen a spinning wheel, and Alex saw this first one at Springwater Fiber Workshop. After the wool is spun and skeined, it is washed in large washtubs: the women stomp on it much like stomping on grapes. Then they beat it against the stone wall to "spin dry" most of the water out of it. (the subtitle here actually says "spin dry") Dyeing is done by the men on the patio in large cauldrons over a wood fire. The warping of the backstrap looms was shown in a slide show on a CD.
First I will show you the parts of the backstrap loom and then I'll describe how it was set up. Alex and his cousin prepared these for us: it took them 6-8 hours per loom. This shows the strap that would go around your hips. Alex was much concerned that the strap would cause us pain, forgetting how well cushioned we Americans are (he is very thin). The stick is used both to form the shed to pass the yarn through, and to beat with. The black strings are the heddles, looped around every other string.
 Another look at the heddles
 This stick is behind the heddles. Note the brown rope. It contains all the threads that do not have a heddle. Note also at the top of the picture, how overspun the yarn is,
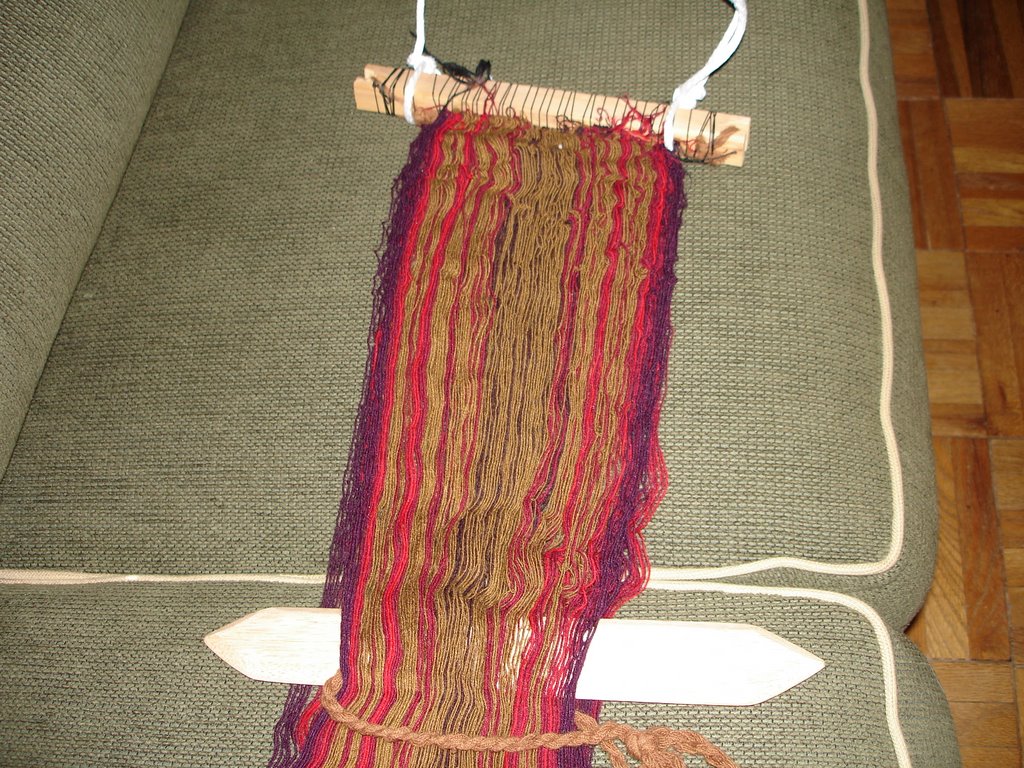
This shows how the warp threads are attached to the loom: they are "sewn" on. If you look carefully against the wood, you can see a little bit of brown rope next to the white rope. The brown rope is placed inside the warp threads and it is actually what gets sewn on, otherwise you'd have to sew every thread on.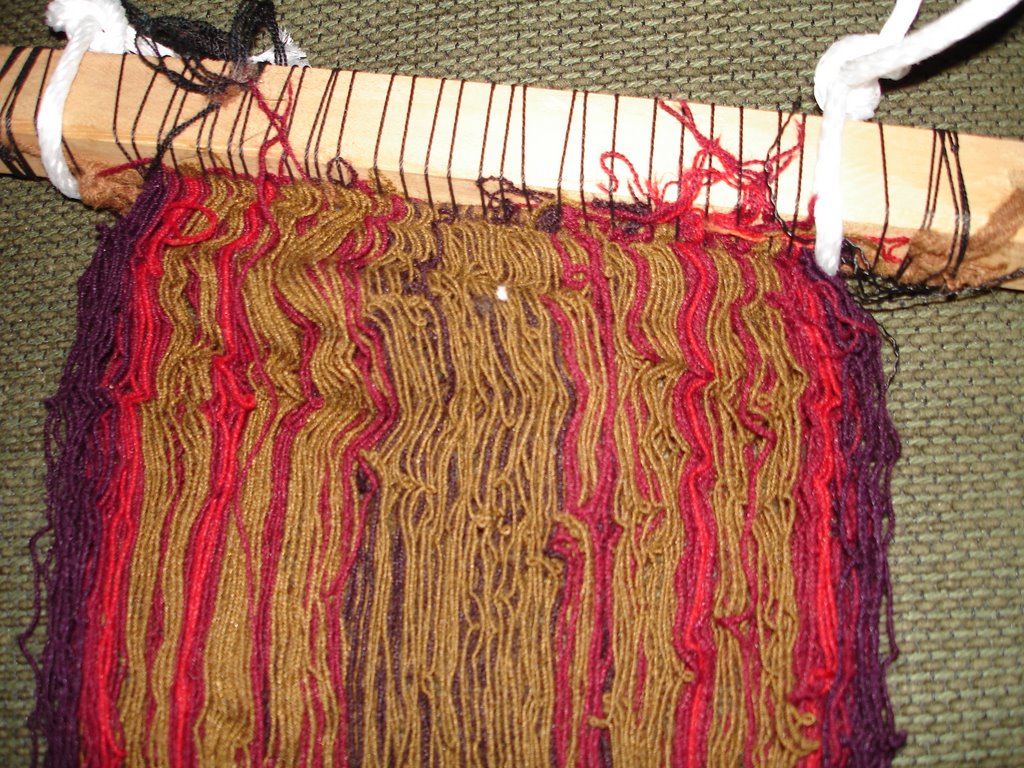 close-up of the rope
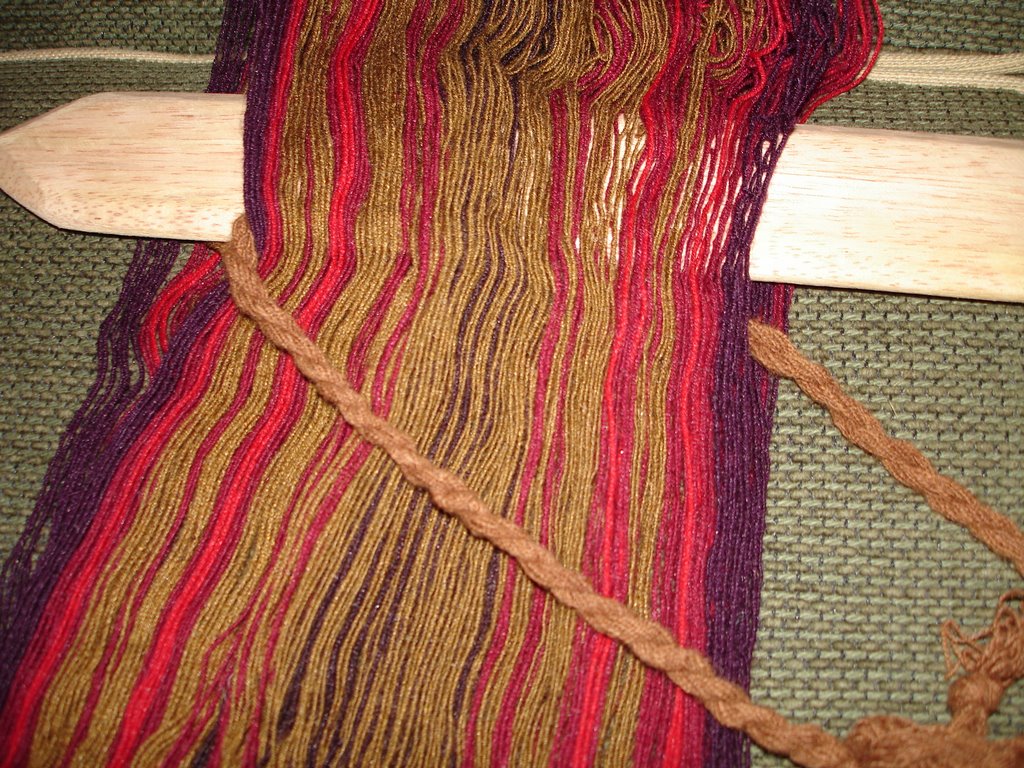 close-up of the heddles. They are "figure-8'd" around every other thread and the top wooden bar. The 2 bars are lashed together to keep the heddles in place.
 showing the sewing at the other end
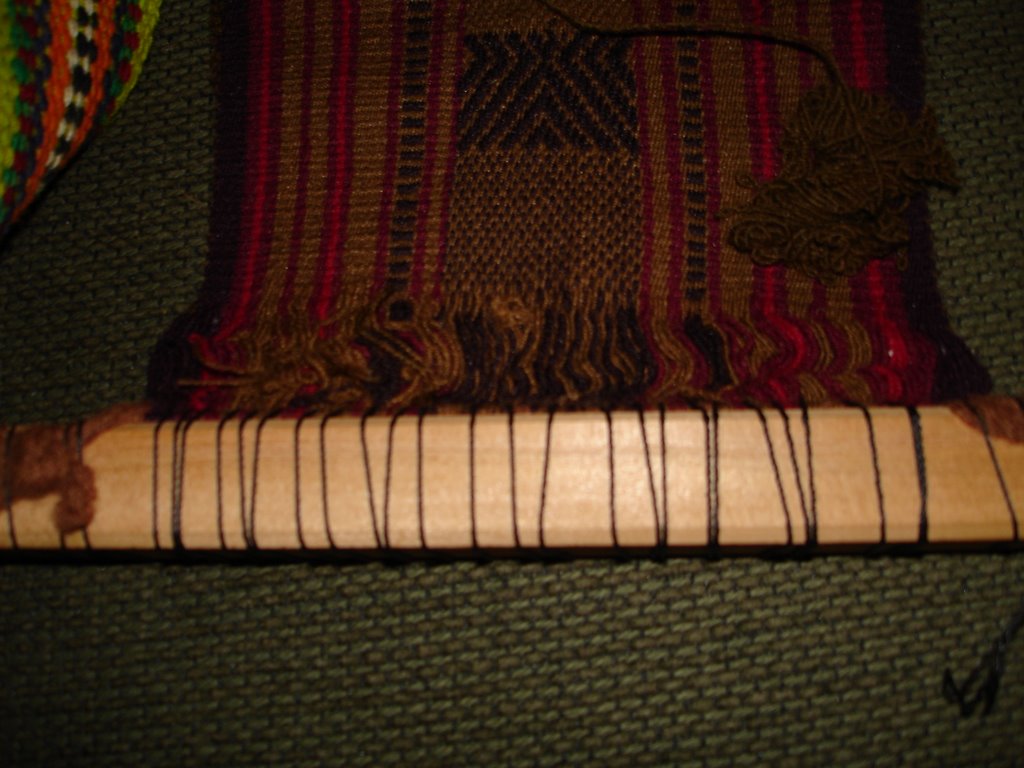 To warp a loom: they had 2 vertical poles set in cement in the ground. The warp thread is passed from one end to the other, with a figure 8 in the middle to keep the cross. The colored threads are warped on in the proper place (i.e.: in the order needed) A rope is placed inside the warped yarn, and this rope is stitched to the loom, as above. It looks like one pass around the loom stick every 1/4-1/2 inch. This is done at both ends. Then the heddles are threaded. (This was not shown) Some way must be utilized to keep the heddle threads separate from the other threads, because the other threads are enclosed by the brown rope. I would guess that a shed stick is used, and every thread that has a heddle around it is on the top of the stick, and the un-heddled threads, if you will, are on the bottom. It would then be simple to enclose the unheddled threads with a rope. Now let's look at how the loom works.
You can see Alex pulling down on the rope encasing the unheddled threads while lifting the wooden bars that have the heddles attached.
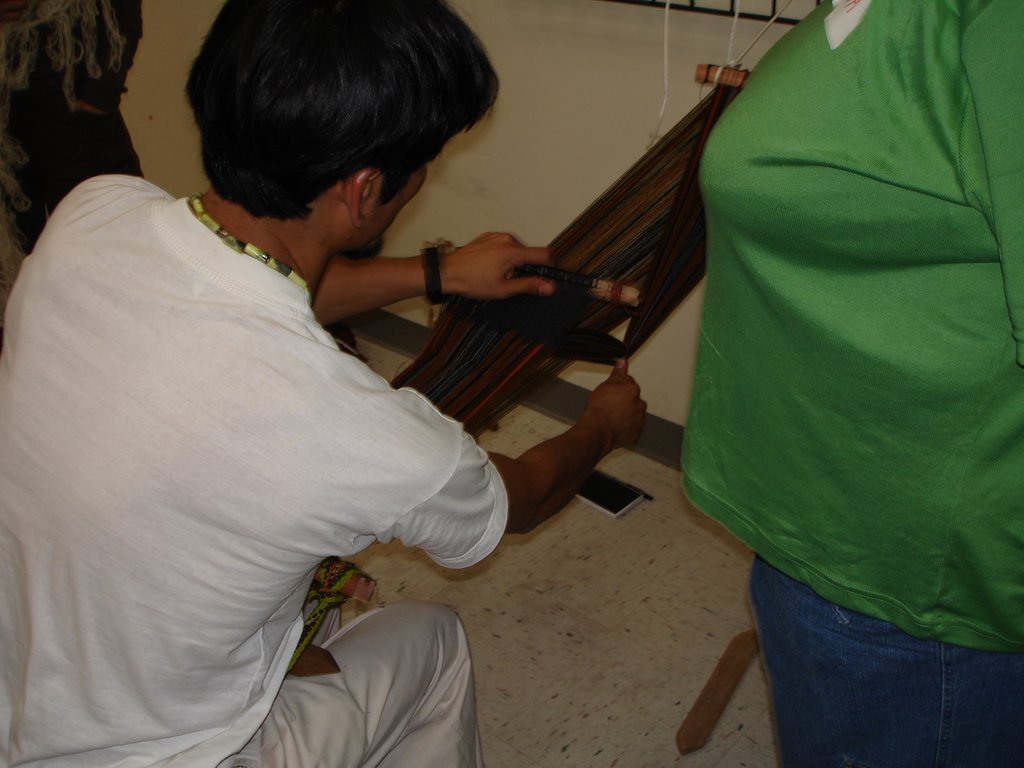 Here he is looking to see if he has a clear shed to pass the stick through. You don't want any crossed threads, or they'll break
 Here he is picking up the design. This was my big surprise. I thought backstrap weaving was an INLAY technique, when it is a PICKUP technique. I had a great deal of difficulty with this. The 2 colors, light brown and dark brown, were very close in value, and in the less than ideal light I couldn't see them very well. In addition, the threads were very thin. You need fingernails (or a tweezers!) The next day I rigged up a light and brought my magnifier that I use for Cross Stitch, and I could see much better. Most of us in the class had "visual issues" in that we're not Spring Chickens any longer, and need brighter light, and either larger threads, or a magnifying glass (my son has to read me instructions off of over the counter meds--the print is too small)
 The shed stick is below the heddles (toward the weaver). At this point, you need to "strum" or "fluff" the threads so they separate easily and don't break when you use the beater stick. The motion is like plucking harp threads (I'm sure you've all plucked harp threads, right?)
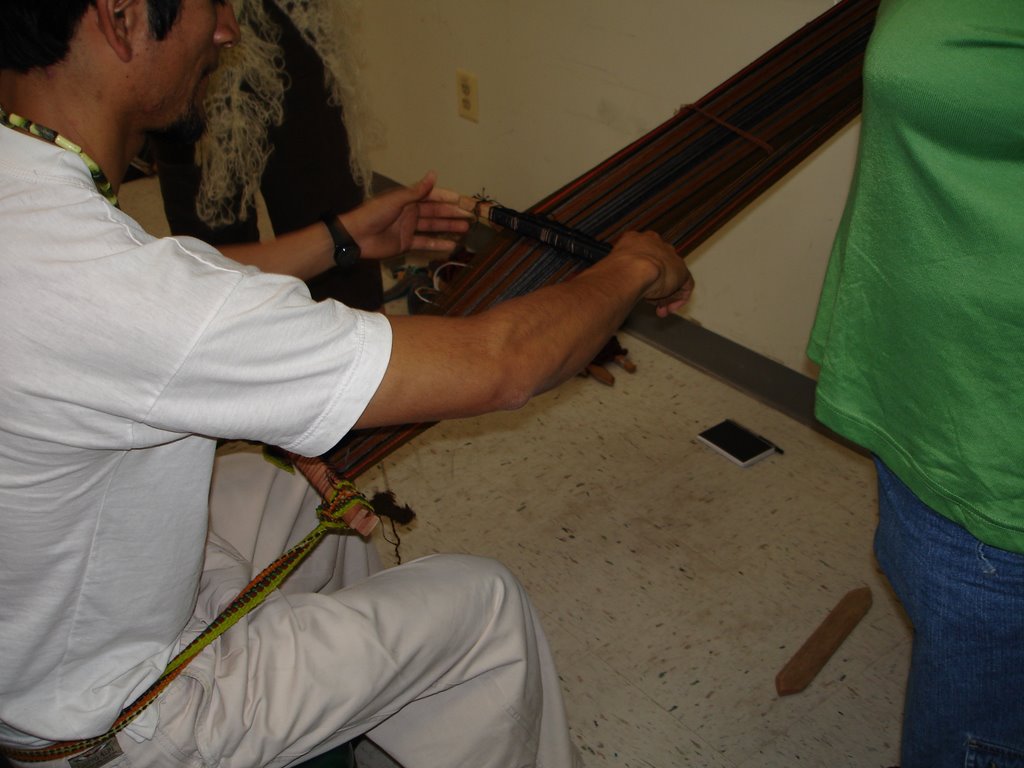
If you look closely, you can see the crossed threads right above Alex's left hand What you don't see before this picture: putting the warp thread through, and then pulling towards you with the stick to seat the thread. It won't actually be encased until you change sheds, as below: lift the rope, and insert the stick.
 Strum the threads until you can place the stick in the shed on the other side of the heddles, beat in the previous weft thread tightly, and then run the weft thread through, beat again. Change sheds by pulling the rope down and heddles up.....repeat. This is just for plain weave. For pickup, after you make a nice shed but before you run the weft through, you have to pick up your design. Sigh. I got REAL GOOD at unweaving. Enough said. It's much harder than I thought, and I have infinite respect for the artists who still do this. Alex uses a 2 harness loom that uses some of the backstrap loom and some of the floor loom. It is set at an angle, so instead of looking down at a flat weaving surface, it looks more like a drafting table at a 30-45 degree angle.
Recommendation: for the first project, use 5/2 or 3/2 mercerized cotton. We had wool, and it was very sticky trying to get a clear shed. Perfect your technique before using your handspun!
Dyes, next bit.
Monday, July 17, 2006
To dye for
 And another color with alum
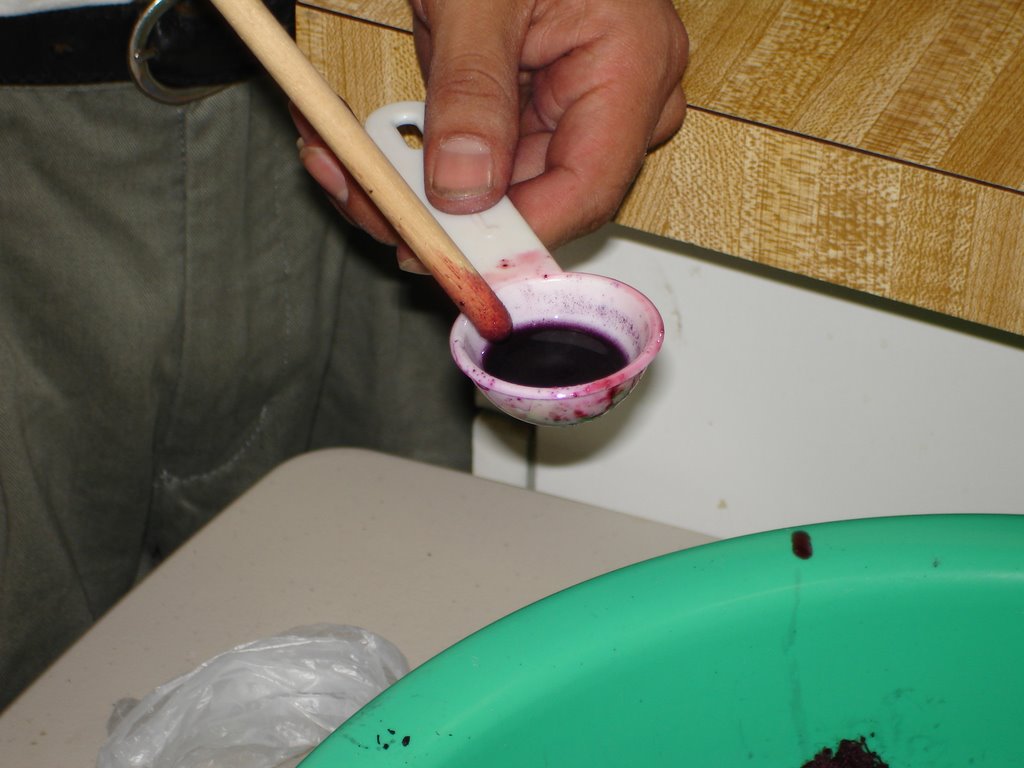 With cochineal he uses copper sulfate, alum and citric acid. If they don't have citric acid at home he uses a lemon, quartered in the dye pot. The copper and alum are found near his home as crystals in the earth. He also finds iron there too. He uses just a pinch (maybe 1/8 tsp). He adds the yarn in dry, unmordanted.
 Colors in the basin: he gets the different depths of color by the length of time in the dye pot. They have been "dipped" twice: once without mordant, and then the mordant is added to the pot and the skeins dipped a minute or less to set the color. Then he plunges them into COLD water--no concern about shocking the wool. He WRINGS it dry.
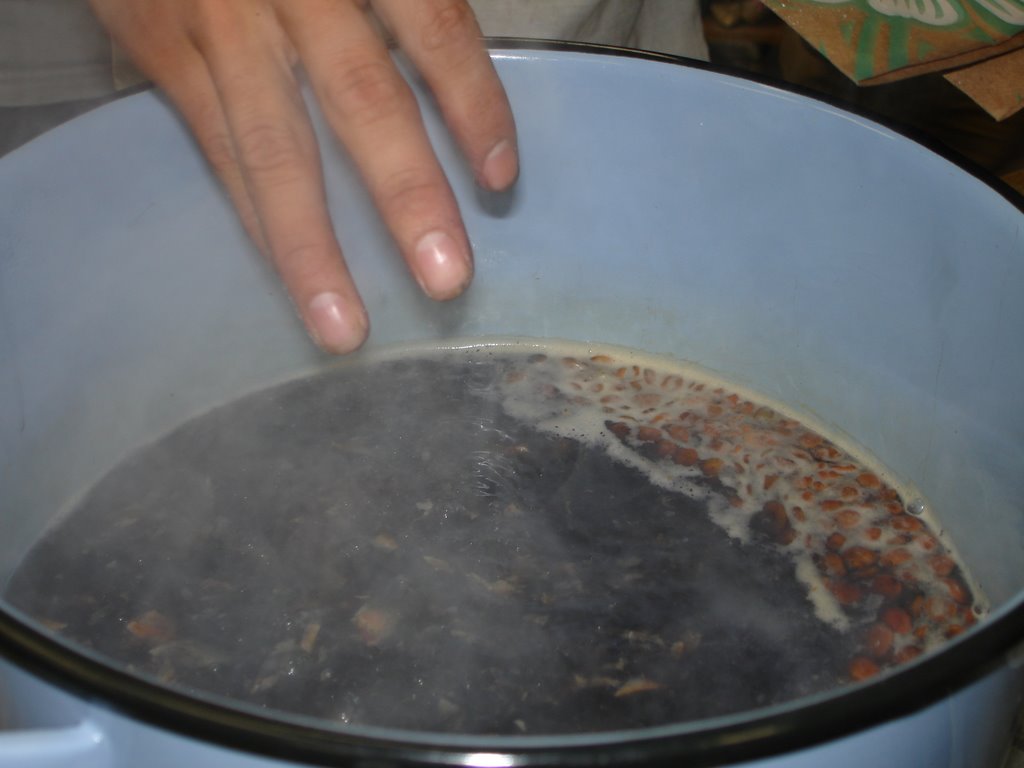
  The next dyepot is with the seed pods of tarak (tarok--I googled both spellings but couldn't find any dye info) These are the pods. They resemble locust beans. Shred up the pods. (This photo looks like severed fingers)
 And place into boiling water for 30 minutes
Add your mordant and watch the water turn blue as if by magic
 He uses iron sulfate and alum and blends them with his high tech equipment
 This yarn is added wet. The color here is not true--it was more purple than that--very much resembled the colors you get with logwood.
 The last bath was from masicopa, which is a root similar to madder. His family hikes up into the mountains to harvest it. The mordant here is ash from 2 trees that don't grow here, one a type of pepperberry tree. The wool is added dry. At home, they keep the bath overnight and redip in the morning. This slowly reacts with air, similar to the way indigo does, to deepen the color.
 Dye pot is orange-red
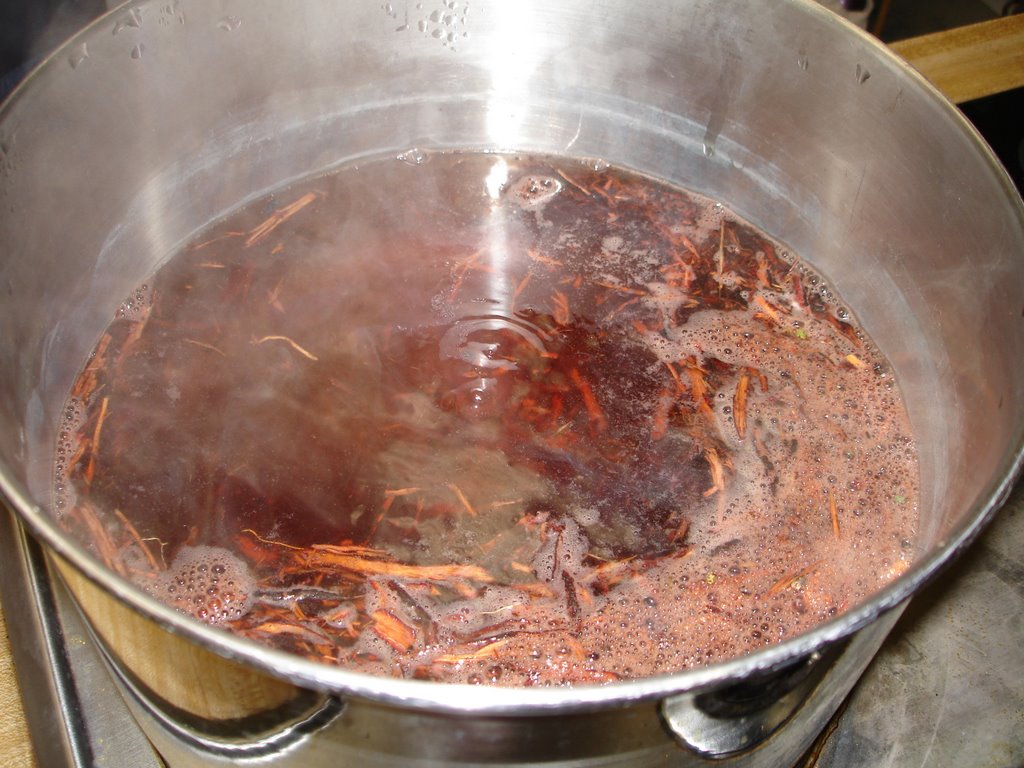
 Here you can see bits of root sticking to the yarn. In all the baths, he did not strain out the vegetable matter
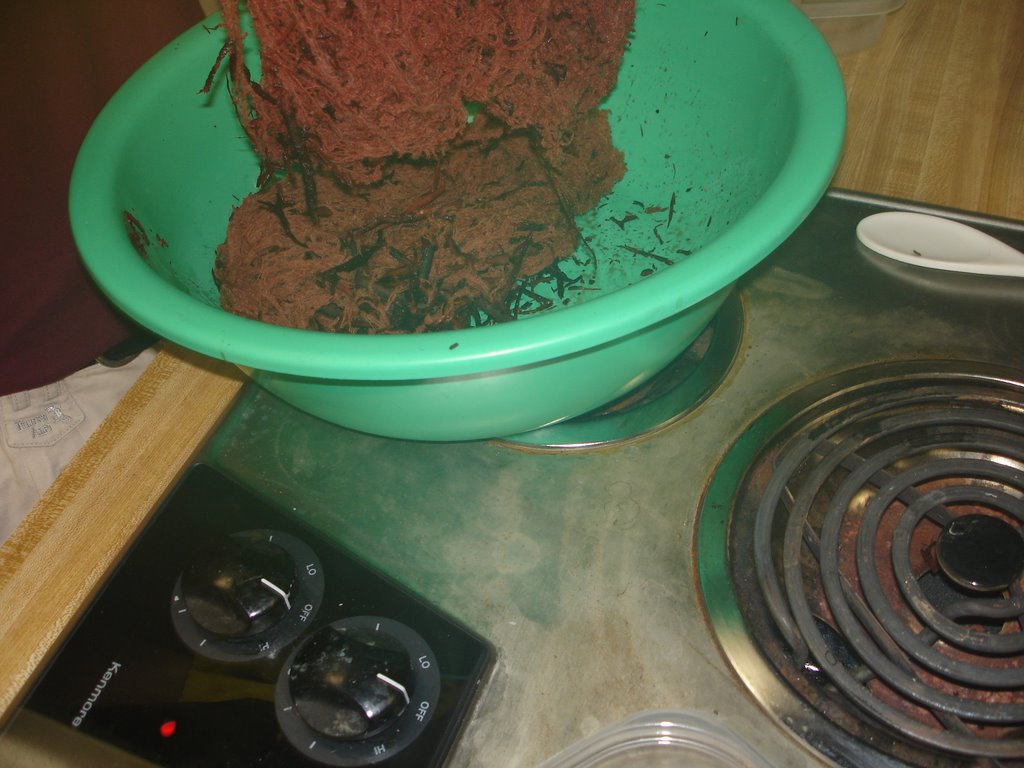 Between dips. The second dip was in walnut leaf water. In Peru there is a plant he calls "nogalo" (quotes are because I don't know how to spell it!). In English, he was calling it walnut. Now, we are all familiar with using black walnut shells/husks for brown dye, but he uses "walnut" leaves as a tannin source. One of the women in the class had a walnut tree, so they (he and the interpreter) went over to her house to collect leaves. He says it is not the same--they smell different! And when we boiled it, the water was a paler yellow than he is used to with his walnut. However, when the yarn was dipped into the walnut water, the color darkened! He says the color is guaranteed for 2000 years.
 Again, the different shades are from different lengths of time in the bath.
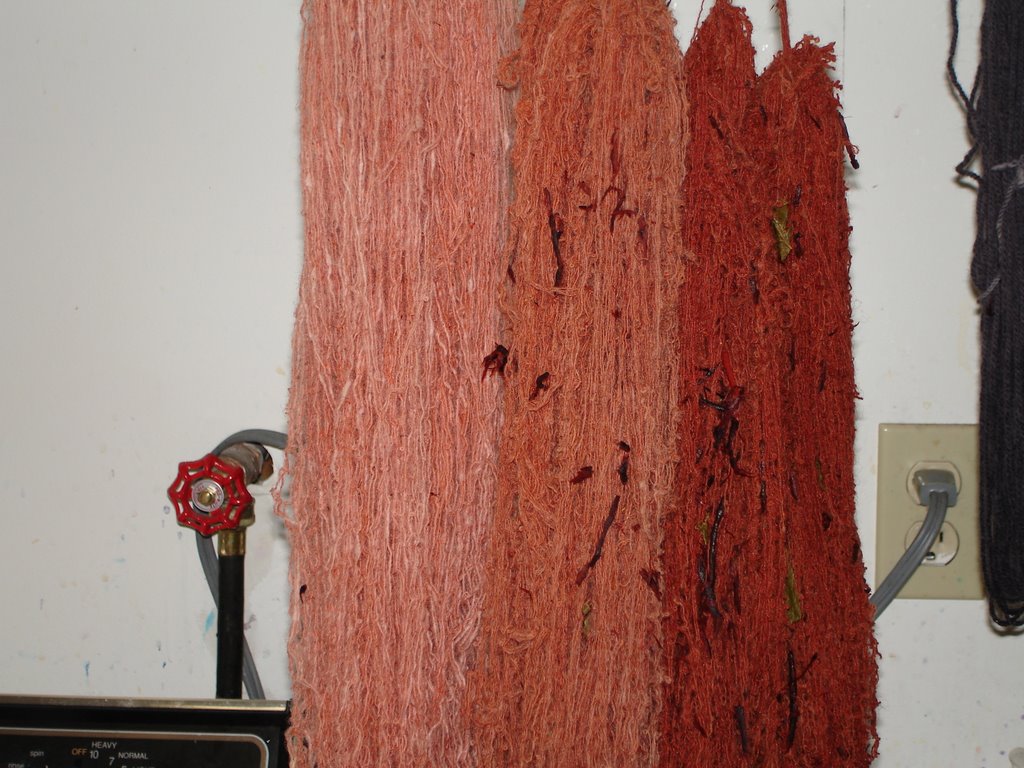 I was fascinated by how different his instructions were from most everything else I had read, or had heard in other classes. He was very specific about the volume of water; I have always read/heard that the volume did not matter; it was the amount of dyestuff and amount of fiber. We have been told to make sure our yarn is thoroughly wet; he adds his dry, and unmordanted. We measure mordant by weight of goods, he uses a pinch. And, apparently, both ways work. I'm now convinced there is NO WAY to screw up natural dyeing.
 And last but not least, we each got a handmade Andean spindle and a ball of alpaca to spin.
Aaahhh....fun times
More fun times ahead--I'm on the way to Penland School of Craft for a 2 1/2 wk class with Deb Menz on designing yarn. Post in about a month!
Sunday, July 16, 2006
and all the rest
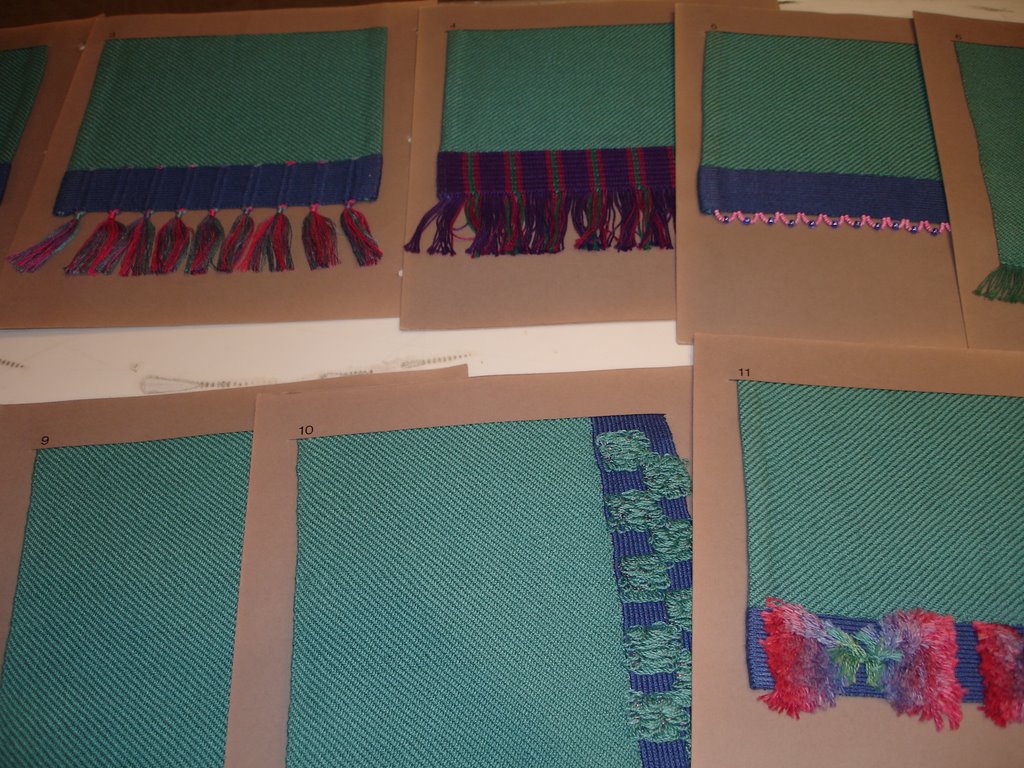 The rest of the pictures show the borders woven into the cloth. The cards are placed back where the heddles are, and the warps are divided into 4 groups and weighted with soda bottles filled with water for tension. As you weave, you occasionally have to do extra cloth wefts to make up for the fact that the tablet weaving grows faster.


I also had lectures on clothing of the 18 & 19th century, but since I have done a bit of reenacting I didn't pick up a lot of new information. Saturday was spent listening to woad dyeing and spinning for wrinkle resistance. Both very informative. I took a class in dyeing with shaving cream. J & D were in the class with me. The supply list should have listed a biohazard suit. It was the biggest mess. Blue hands for days. When we washed out the excess dye in the bathtub, it looked like a slaughterhouse. Out of 25-30 pieces, only 1 turned out well. No pics on these. Next up: a 3-day workshop on backstrap weaving and natural dyes from Peru. Si habla Espanol? You can probably guess I don't.
![]()