Wednesday, January 25, 2006
fun with beads
 This is Danish Medallion lace, from Handwoven Jan/Feb 2001, used to attach beads to weaving. There was a more recent article, but I can't find it right now. It was a cute little girl's top with beads on it. I'm using it on a table runner. First, I decide on the spacing for the beads. I just lay them out until I decide how many I want, then I divide the space evenly. For this runner, I have 24 ends at both edges, then 2.25 inches between, and 2.5 between the middle one and the 2 at both sides of it. If you look closely, you can see a thicker line just below the beads that are already attached. This is the "outline" pick, formed by running the weft thread 2 or 3 times across, just catching the floating selvage. Then weave above it, just the length of the beads you will be attaching. Open your shed.
 Bring the shuttle through the open shed and exit at the point marked by the pin.
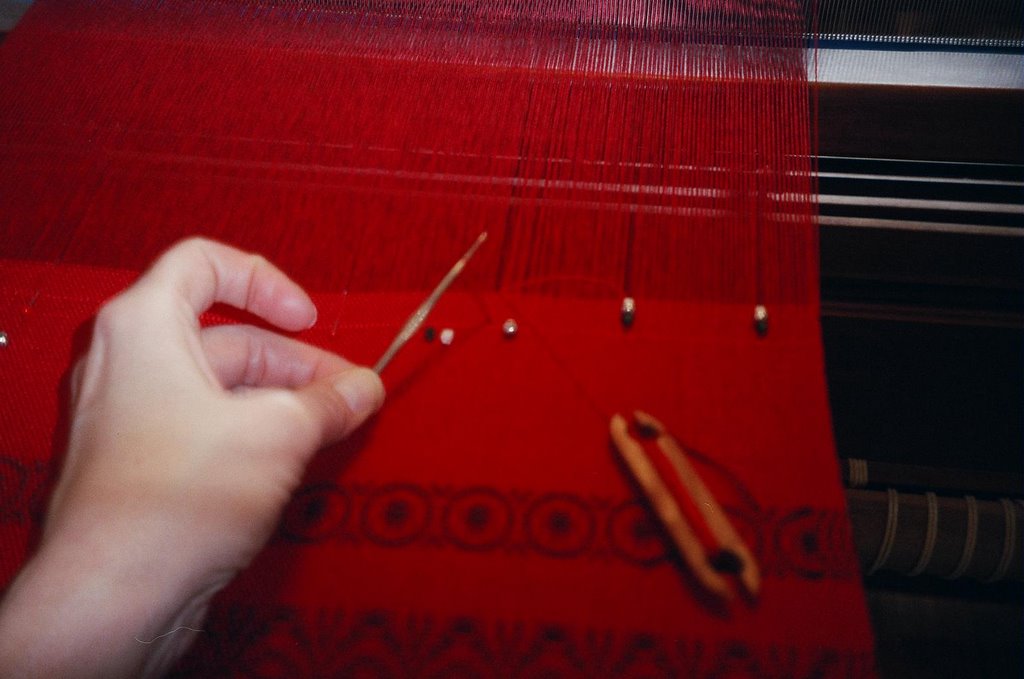 Sorry this one is so blurry--I was shooting with one hand while holding the hook with the other. Use a crochet hook to bring the thread up through the weaving just above the outline pick. The shuttle is resting on the weaving, but has been brought throught the shed at the space you see above, and the weft thread is loose so I can draw it up through the cloth.
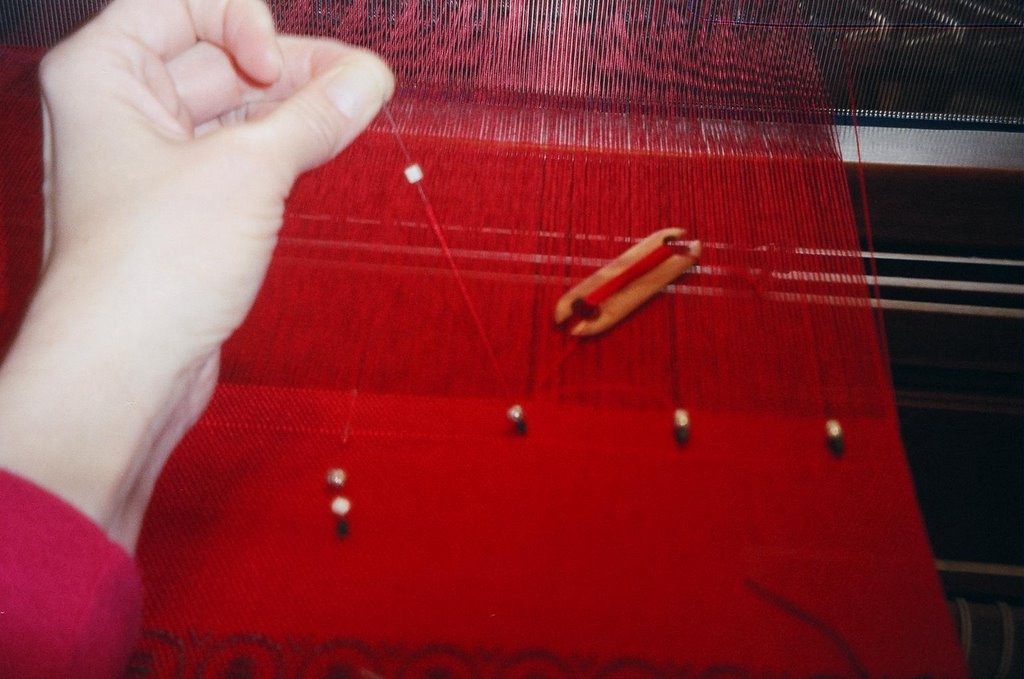 Using a needle, bent piece of fishing line, or piece of quilting thread, thread the beads on the loop. I find the fishing line is easier to get the looped weft thread through the tiny bead holes. Bend the fishing line or thread into a "V", and hook the V through the looped weft. Make sure your beads will be oriented the same way at both ends of the runner. Since I do mine in bits and pieces over a week or so, I write down the order of bead color, and which color is closest to the edge of the weaving.
 Pull the shuttle through the loop created at the top of the beads. Be sure to feel underneath so there are no loose threads on the backside. Pull on the thread coming off the shuttle to tighten the beads flat to the cloth. Repeat across the weaving by opening the shed and exiting at the next pin point. At the end of the bead row, I usually weave a few rows with the little shuttle before changing over to my normal sized one.
Ta Da! I will weave another 5 inches for the border, and then handsew a 1.5 to 2 inch hem. The pattern is Johann Schleelein's No. 123 from A Handweaver's Pattern Book by M. Davidson.
# posted by Ellen @ 5:40 PM 
Comments:
<< Home

Hi blogger, I was out blogging and came across your site. It's been great reading through. It certainly looks like you've taken time to organise it. Well done and keep up the good work.
Regards
Artistic Beading help.
Regards
Artistic Beading help.
# posted by  : 11:30 PM
: 11:30 PM
Hello there blogger, I've been reading through a few blogs on your subject and not many are as good as yours. You should be proud of your good work - well done.
Regards
Beading For Beginners Resources.
Post a Comment
Regards
Beading For Beginners Resources.
# posted by : 11:55 PM
: 11:55 PM << Home
![]()